Setting a timer
Due for Mac Help > Timers > Setting a timer
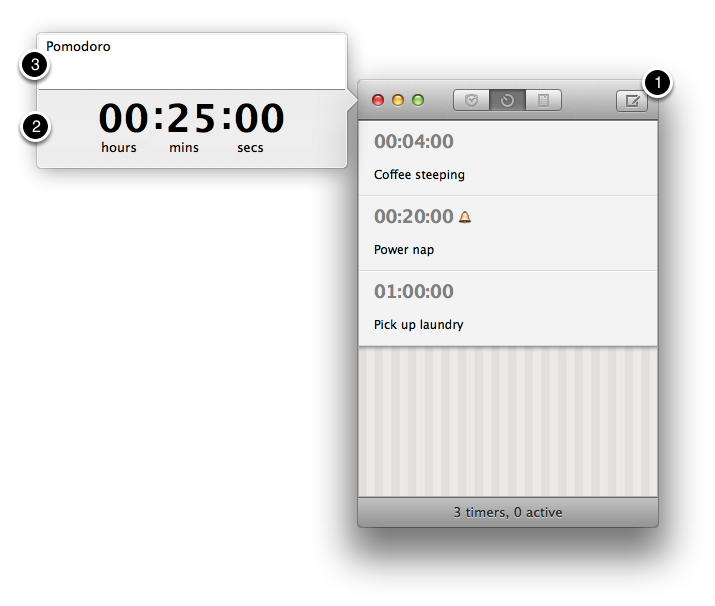
Adding a timer
To add a new timer, click on the New button in the top right corner of the window. You can also choose File > New Item from the menu, or use the keyboard shortcut by pressing Command (⌘)-N.
Set the timer countdown duration
By default, Due highlights the hour component of the countdown duration (labelled 2) first. You can start setting the number of hours by typing in a number from 0-99.
Then, switch to the minute or seconds component as needed either by clicking on the number above the component's label, or by using the keyboard shortcut Tab.
Optionally name your timer
If you wish to name your timer, click on the title field (labelled 3), or use the keyboard shortcut Tab or Shift-Tab to move to the next or previous fields.
If no name is provided, Due will automatically name the timer after the length of its countdown duration. For instance a timer set for 00:01:30 will be named 1 min 30 secs timer. If you change the duration of the timer in future, the name will also be updated accordingly to reflect its new duration.
Save the reminder
Press Return to save the reminder. You may need to press Return a second time if you've entered a number into one of the components that Due needs to convert at the time of saving,
Due for Mac Help > Timers > Setting a timer